Magento 2 Quickstart
Setting up a Magento 2 CI/CD pipeline on Bitbucket using Hipex Deploy
Introduction
This quickstart aims to guide you through the process of setting up a continues integration and delivery/deployment pipeline for a Magento 2 shop, using Bitbucket as our CI-system. For simplicity reasons, we'll only focus on one environment: Staging.
Prerequisites
Before starting, make sure you have the following requirements setup correctly:
- A Hipex server
- A Bitbucket account
- A Pack (Hipex Control Panel) Developer account. This allows you to manage SSH keys from within the control panel.
Create Deployment SSH key pair
As a best practice, we'll generate a SSH public/private key pair that we solely use for deployments:
Generate a key pair without passphrase:
ssh-keygen -f id_rsa_myproject_deployConfigure Deployment SSH public key for your server
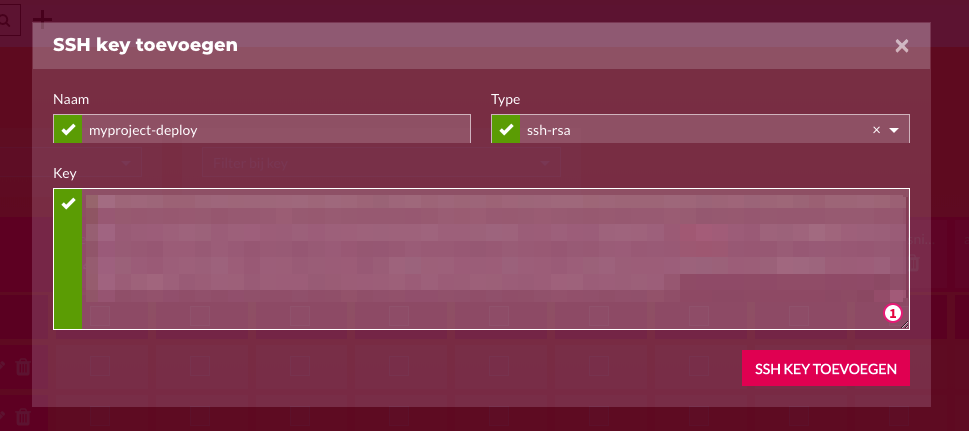
First, go to Pack > SSH Management > Add SSH key and add the key you just created.
As a convention, name your key [projectname]-deploy.
Make sure you don't include any key prefix, like ssh-rsa.
Go to Pack > SSH Management and filter down the server name and SSH key.
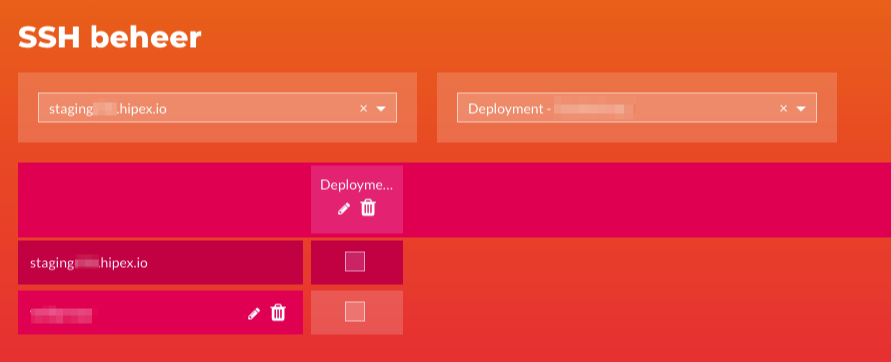
Add the key to your server by checking the box. To verify that the deployment key is added, you can also SSH into your machine and search for the key name in the authorized keys file:
cat ~/.ssh/authorized_keys | grep myproject-deployConfigure your Deployment SSH key pair in Bitbucket
Now that your deployment key is generated and added to your server, it's time to configure the deployment key pair in Bitbucket.
Go to your Bitbucket repo and then to Settings > Pipelines > SSH keys.
Select "Use my own keys", so we can add the deployment key pair we just created.
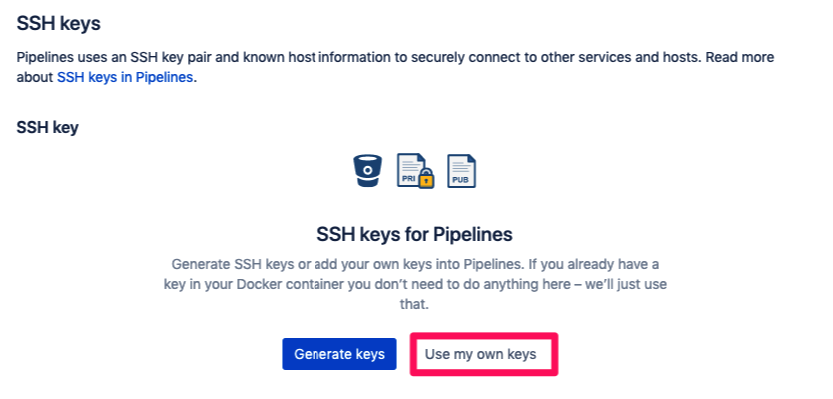
Copy both the private and public key from your deployment key pair, paste them as is (modifying the contents could result in "invalid key format" issues), and press Save key pair.
cat id_rsa_myproject_deploy | pbcopycat id_rsa_myproject_deploy.pub | pbcopy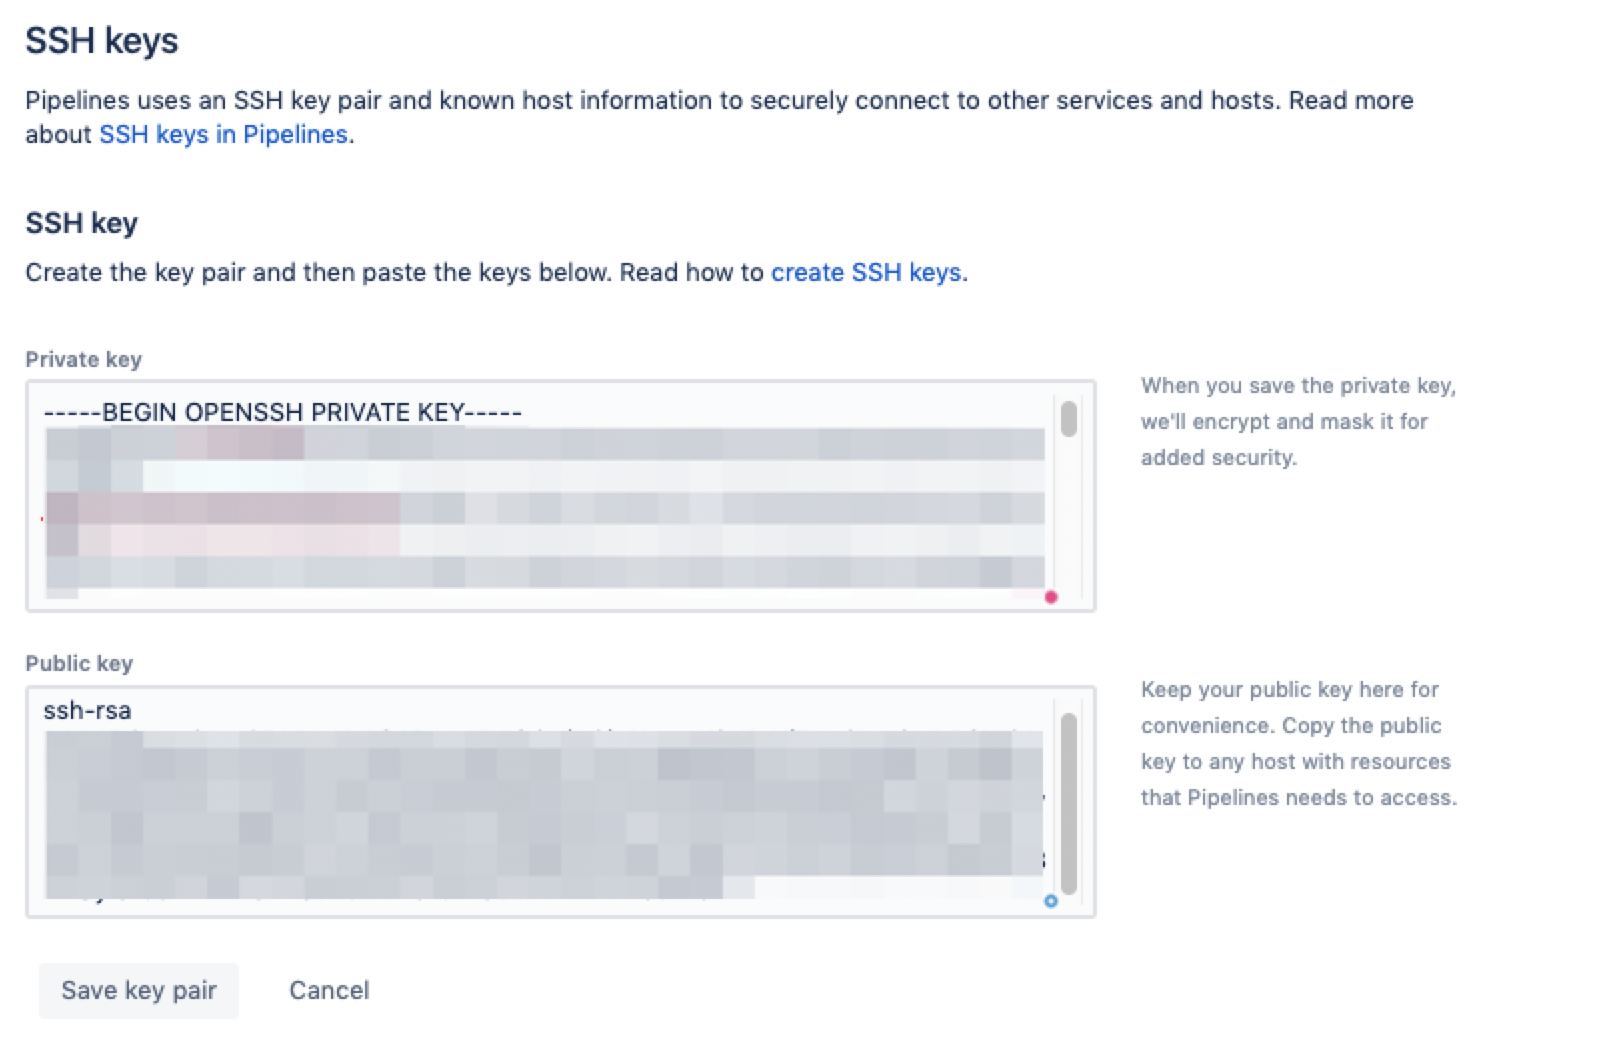
Dump Magento configuration to configuration files
For a successful pipeline it is important that the neccesary configuration from the Magento Admin is exported to files, because we can't and do not want to have database dependencies / connections within a CI pipeline.
Use the following command to dump the configuration to files:
bin/magento app:config:dumpStrip the configuration files so that 'app/etc/config.php' contains only the essential configuration. Add 'app/etc/config.php' to your Git repo history, but not 'app/etc/env.php' because this file only needs to live on the server.
Read more about dumping Magento configuration in the devdocs of Magento.
Create Hipex Deploy configuration file
Now we added and configured the deploy key, it's time to setup the deployment configuration using "configuration as code". We just need a deploy.php file in the root of the project.
The Hipex Deploy configuration file (here on Github) is a php file that contains a configuration object that will be used by the Hipex Deploy Docker image (that we will later configure in the Bitbucket CI configuration) to perform configured CI/CD steps.
Optional: to get code completion for your deploy configurations, add the Hipex Deploy Configuration composer package as a development package to your project:
composer require hipex/deploy-configuration --devYou can either start from scratch with an empty deploy.php file, or use one the starter templates and continue from there.
For this quickstart we'll use the Magento 2 starter template configuration. This template contains a default configuration for Magento 2 projects, which can be modified and extended to your own requirements.
The configuration for just a staging environment could be as short as this:
<?php
namespace HipexDeployConfiguration;

$configuration = new ApplicationTemplate\Magento2(
    // Your GIT repository url
    'git@bitbucket.org:myorg/myproject.git',
    // Frontend locales
    ['nl_NL'],
    // Backend locales
    ['nl_NL']
);

$configuration->setPhpVersion('php73');
$stagingStage = $configuration->addStage('staging', 'staging.myproject.com', 'myprojectsshuser');
$stagingStage->addServer('mystagingserver.hipex.io');

return $configuration;
Now we have to provide the files and folders that don't change per deployment and thus will be shared over multiple deployments.
Common examples of shared files are configuration files such as .env, env.php and config.php. Often, those files are not under source control and might be generated / composed by the application or CI/CD system.
The M2 starter template we're using already contains the following shared files configuration:
$configuration->setSharedFiles([
    'app/etc/env.php',
    'pub/errors/local.xml'
]);
Common examples of shared folders are: media, uploads, var/import and var/log.
The M2 starter template already contains the following shared folder configuration:
$configuration->setSharedFolders([
    'var/log',
    'var/session',
    'var/report',
    'pub/media'
]);
Now it's time to add our build, deploy and after deploy commands.
The M2 starter template contains the following default build commands:
$configuration->addBuildCommand(new Command\Build\Composer());
$configuration->addBuildCommand(new Command\Build\Magento2\SetupDiCompile());
$configuration->addBuildCommand(new Command\Build\Magento2\SetupStaticContentDeploy($localesFrontend, 'frontend'));
$configuration->addBuildCommand(new Command\Build\Magento2\SetupStaticContentDeploy($localesBackend, 'adminhtml'));
And the following deploy commands:
$configuration->addDeployCommand(new Command\Deploy\Magento2\MaintenanceMode());
$configuration->addDeployCommand(new Command\Deploy\Magento2\SetupUpgrade());
$configuration->addDeployCommand(new Command\Deploy\Magento2\CacheFlush());
Create Magento 2 configuration files
For Magento 2 your first build will fail due to missing configuration. Login to the server and depending on your project file edit app/etc/env.php or app/etc/local.xml. You will find these files in ~/domains/<domain>/application/shared/.
Create Bitbucket configuration file
Now it's time to create your CI configuration file. You can either start from scratch or use the Hipex Deploy Bitbucket configuration starter template.
The CI configuration file needs to make use of the Hipex Deploy image in order to run your CI/CD pipelines succesfully. We serve multiple flavors of the Hipex Deploy image, one for every PHP + NodeJS version combination. See Docker Hub for all supported flavors. As new PHP / Node versions come out, we'll bake more images to support those.
Choose a version of the hipex/deploy image that best reflects your application needs.
Here's an example of a bitbucket-pipelines.yml file that uses the PHP 7.3 + Node 13 flavor and is configured with a configuration for the staging environment, containing a build step and deploy step to perform the deployment to the configured staging server. It uses the configuration provided in deploy.php to perform the steps.
image: hipex/deploy

pipelines:
    branches:
        # Deploy to staging
        staging:
            - step:
                  name: Build
                  image: hipex/deploy:php7.3-node13
                  script:
                      - hipex-deploy build
                  artifacts:
                      - build/**
                  caches:
                      - composer
            - step:
                  name: Deploy
                  deployment: staging
                  script:
                      - hipex-deploy deploy staging
Optional: Test your Build and Deploy commands locally
Now that we're done with the project configuration, we can test the configured Build and Deploy steps locally before committing and pushing to the remote Git repo. Because we don't have to wait for the Bitbucket pipeline result this will reduce the time of the feedback loop drastically. You'll need to have a Docker client setup in order to test your build and deployment locally.
Run the hipex-deploy build command locally. We assume that the private key of the earlier created deploy key is located at ~/.ssh/id_rsa_myproject_deploy, and that is has access to the main Git repository, private packages and the SSH user. Keep in mind that the provided SSH_PRIVATE_KEY environment variable needs to be base64 encoded.
docker run -it --env SSH_PRIVATE_KEY="$(cat ~/.ssh/id_rsa_myproject_deploy | base64)" -v `pwd`:/build hipex/deploy:php7.3-node13 hipex-deploy build -vvvBecause all hipex-deploy commands are implemented as Symfony Console commands, we can append the build command with a flag to determine the verbosity level, like -vvv to display all messages. This will be useful to debug any errors.
Just like the build command, we can also test the deploy command. For this example we first set the environment variables before using them in the command.
export SSH_PRIVATE_KEY=***
export DEPLOY_COMPOSER_AUTH=***

docker run -it -e SSH_PRIVATE_KEY -e DEPLOY_COMPOSER_AUTH -v `pwd`:/build hipex/deploy hipex-deploy deploy staging -vvv
Commit and push project CI/CD configurations
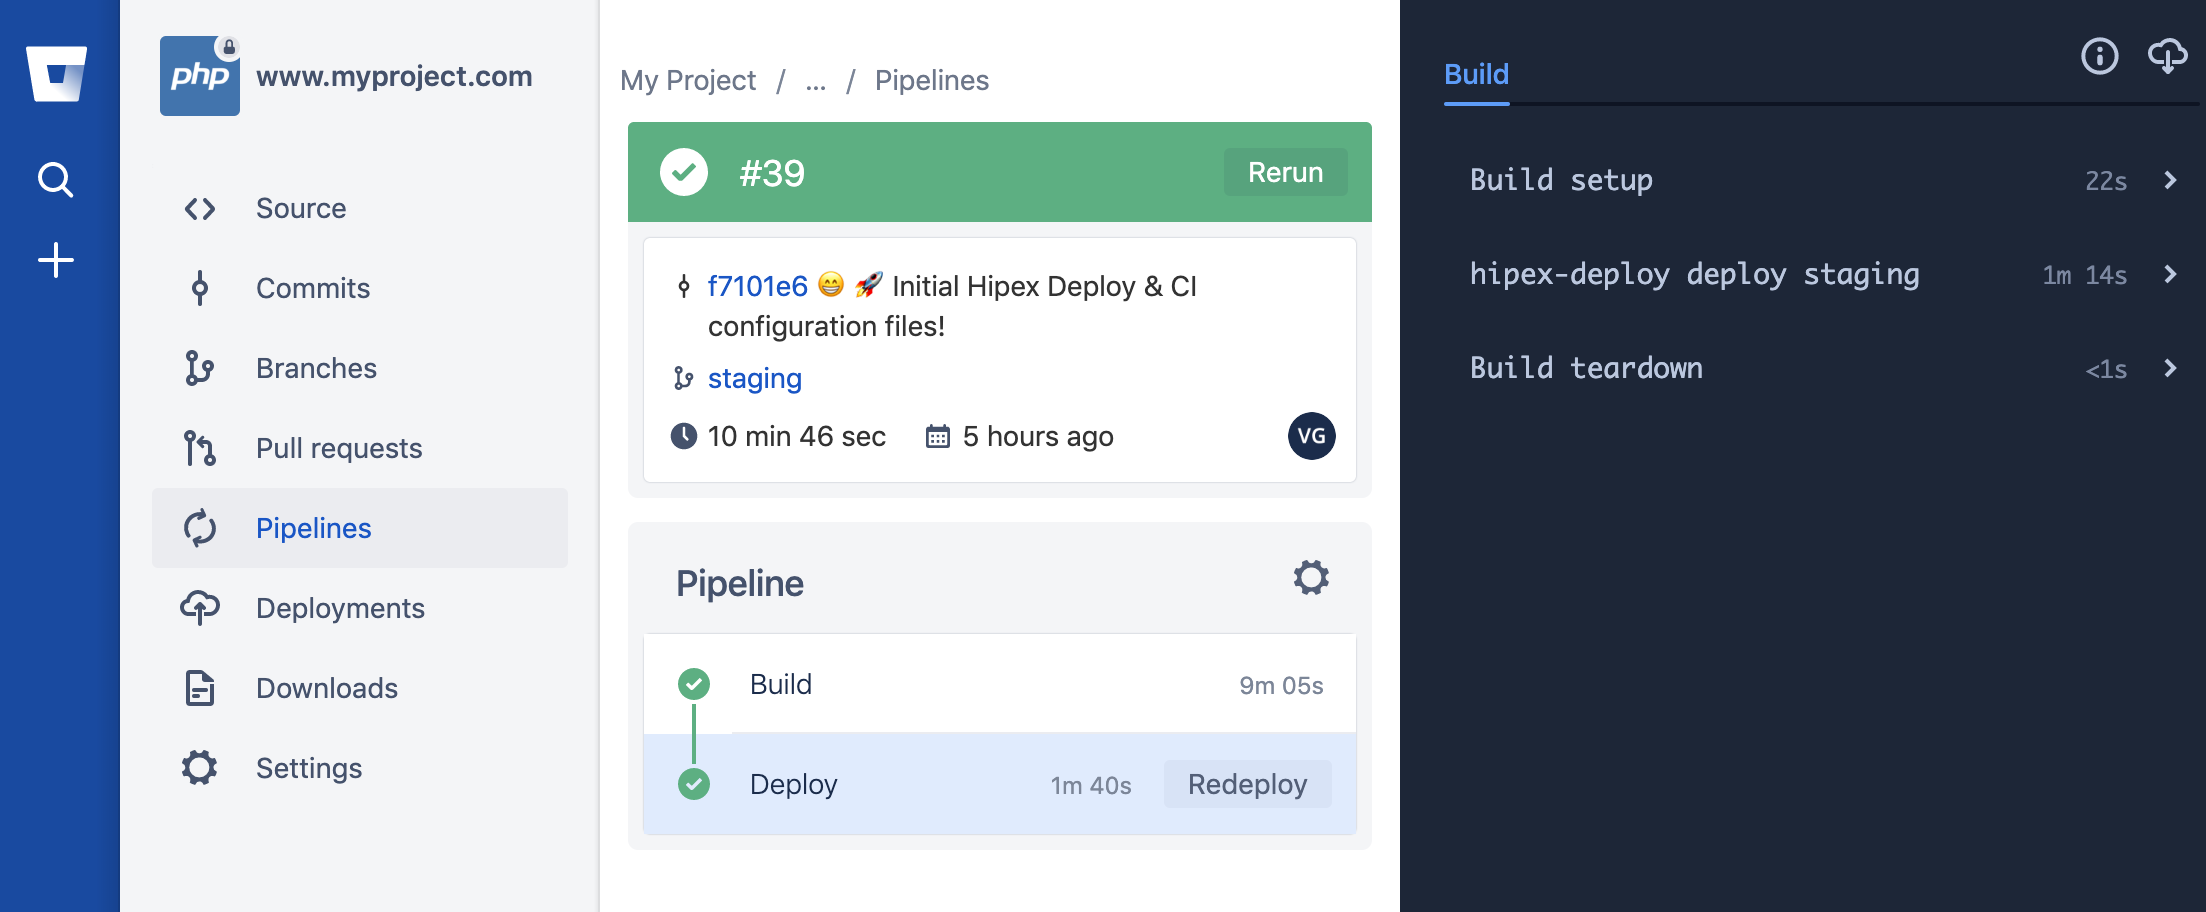
Now that all project configuration is done and we verified that both our build and deploy commands run locally as expected, it's time to commit and push both the Hipex Deploy configuration (deploy.php) and CI configuration (bitbucket-pipelines.yml) to the remote Git repository.
After that's done, Bitbucket will automatically trigger the pipeline as configured. The only accepted outcome is a pipeline that completely succeeds!